Creating Sockets
Basic classes
Basically the geonodes classes are instantiated using the default constructor. The optional name argument is used to create a Group Input socket.
See the examples in How it works
Additional parameters can be passed depending on the type of input:
- tip for description
- default_attribute
- subtype
- min and max
- hide_value
- hide_in_modifier
- single_value
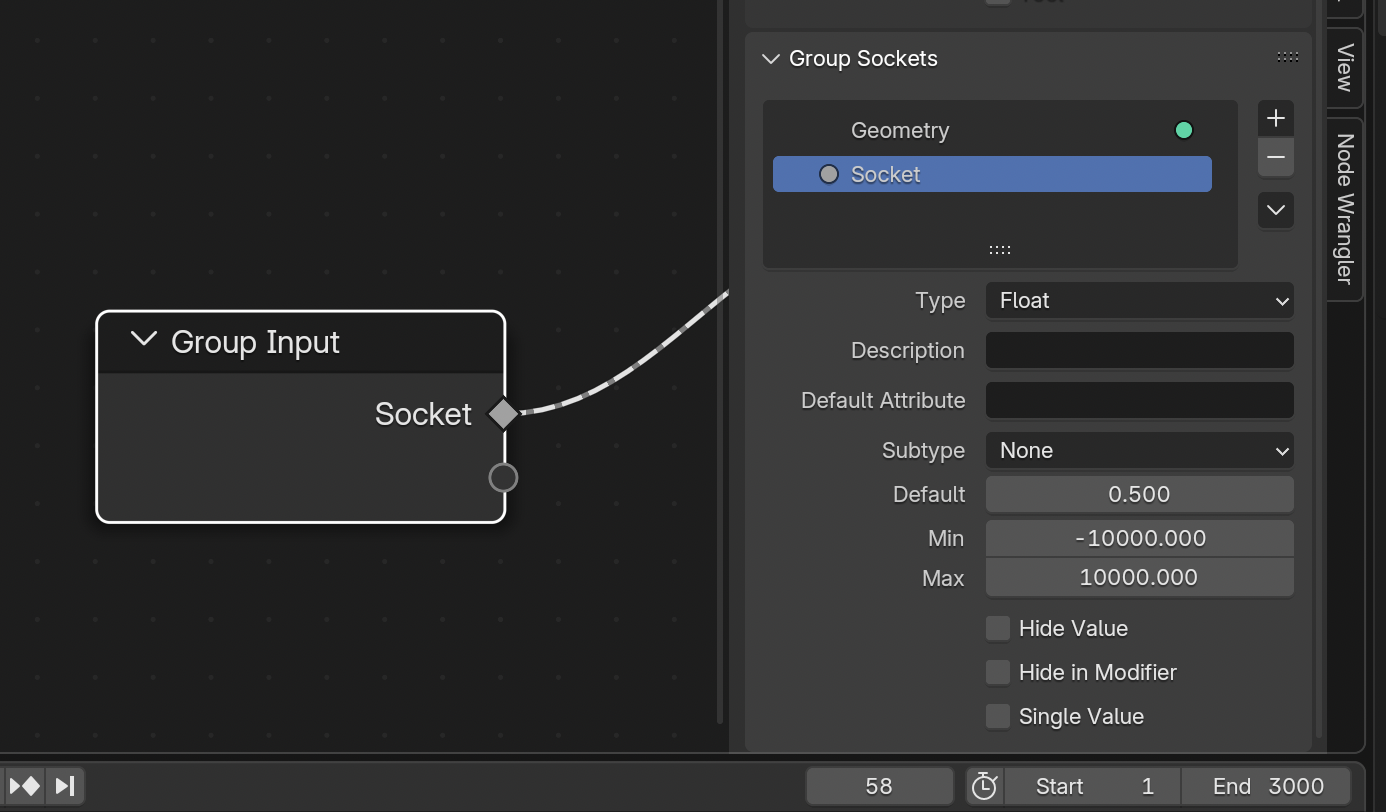
Rather than giving the subtype as a parameter, you can use the dedicated constructors as shown below: b types can be defined by using dedicated constructor as shown below:
# An integer between 2 and 10
resolution = Integer(2, "Resolution", min=2, max=10, tip="Mesh resolution", single_value=True)

# A float factor between 0 and 1
factor = Float.Factor(.5, "Factor", 0, 1, "Modification factor")
Forward input
The special class Input can be used as function argument to get the argument value from Group input as shown below:
with GeoNodes("Input"):

    # ---------------------------------------------------------------------------
    # Initial creation
    # ---------------------------------------------------------------------------

    # Node input sockets can be created first to make clear the interface
    # of the node

    # ::::: Node inputs

    height = Float(3., "Height", 0, 10)

    with Panel("Helix Params"):
        resol   = Integer(12, "Resolution", 5, 100)
        rots    = Float(2, "Rotations", 0.1, 10)
        radius  = Float(1., "Radius", 0.01, 2)

    # ::::: End of input

    helix = Curve.Spiral(resolution=resol, rotations=rots, start_radius=radius, end_radius=radius,height=height)

    # ---------------------------------------------------------------------------
    # Using Inputs
    # ---------------------------------------------------------------------------

    # Input special socket creates a socket of the proper and name and type
    # In the following exemples, Group Input sockets will be automatically
    # created for each socket fed by Input()

    with Panel("Cube Params"):
        cube = Mesh.Cube(size=Input(), vertices_x=Input(), vertices_y=Input(), vertices_z=2)

    # ---------------------------------------------------------------------------
    # Linking several sockets
    # ---------------------------------------------------------------------------

    # Use the node method link_inputs to create input sockets without
    # having to list them
    # Use include and exclude argument to refine the links

    spiral = Curve.Spiral()
    # Link all the inputs but the height
    spiral.node.link_inputs(None, "Spiral", exclude=["Height"])
    # The height is fixed
    spiral.height = Float.Input("Height")

    Geometry.join(helix, spiral, cube).out()
Panels
Inputs can be placed into a panel in two ways:
- Using the Panel class in a with context block
- Using the panel argument when initializing the input
from geonodes import *

with GeoNodes("Panels"):

    # Create two options in a panel named Options
    with Panel("Options"):
        shade_smooth = Boolean(True, "Shade Smooth")
        subdiv = Integer(1, "Subdivision", 0, 5)

    # Create a third value in this panel using the argument syntax
    change_mat = Boolean(True, "Change Material", panel="Options")

    # Methods can be combined
    with Panel("Options"):
        new_mat = Material(None, panel="Sub options")

    # The panels can be chained with > char
    fac = Float.Factor(.5, "Factor", 0, 1, panel="Options > Sub options")

    sph = Mesh.UVSphere().subdivide(subdiv)
    sph.faces.smooth = shade_smooth
    sph = Mesh(sph.switch(change_mat, Mesh(sph).set_material(new_mat)))
    sph.points.Factor = fac

    sph.out()
Blender resources
Blender resources (Object, Collection, Material, Image, Texture) are refered either using their blender python value or simply by their name as shown below:
# Default cube
bl_cube = bpy.data.objects.get("Cube")
cube_obj = Object(bl_cube, name="Your object")

# The following line is equivalent
cube_obj = Object("Cube", name="Your object")
Geometries
Geometry and its subclasses are instancied through their constuctors (Mesh.Cube or Curve.Spiral for instance).
When instancied directly, a new Group Input socket is created.
If the name is not passed as key word argument, the default name is used.
import bpy
from geonodes import *

with GeoNodes("Creating Geometries"):

    # Geometry group input node is used if it exists,
    # Otherwise a group input node named 'Mesh' is created
    mesh = Mesh()

    # Node 'Cube'
    cube = Mesh.Cube()

    # In Groups, other geometries can be created
    curve = Curve(name="Curve")

    # Gemetries can be converted
    spiral = Curve.Spiral().to_mesh(profile_curve=Curve.Circle(radius=.1))

    # Volume
    cube_vol = Volume.Cube()

    (cube + mesh + curve + spiral + cube_vol).out()
Named Attributes
Named attributes can be stored using store_named_attribute or its short version store. These methods
must be called on a domain, such as in Mesh.points.store("A Named Int", 1).
One can also uses the named attribute property syntax which creates a named attribute for a property starting by a capital
letter: Mesh.points.A_Named_Int = 1 is equivalent to Mesh.points.store("A Named Int", 1).
Warning
To avoid names collision, the named attribute MUST start with a capital letter. Underscore chars are replaced by spaces in the stored name.
Reading a named attribute is done using the class constructor NamedAttribute, or its short version Named.
For instance, reading a Vector named "Direction" is done with Vector.Named("Direction").
One can even further shorten the syntax by instantating a new class with an attribute name rather than with a value:
Vector("Direction") is interpreted as Vector.Named("Direction").
from geonodes import *

with GeoNodes("Named Attributes"):

    cube = Mesh.Cube()

    # ----- Storing a named attribute

    cube.points.store_named_attribute("Weight", 1.)
    # or the short name
    cube.points.store("Weight", 1.)
    # or using the named attribute property syntax
    # Note that the first letter is a capital
    cube.points.Weight = 1.

    # ----- Reading a named attribute

    weight = nd.named_attribute("Weight", data_type='FLOAT')

    # A better way is to use a class constructor
    weight = Float.NamedAttribute("Weight")
    # or the short name
    weight = Float.Named("Weight")
    # or even shorter, using a string as constructor value
    weight = Float("Weight")

    cube.out()